When a wide board meets a narrower one, cutting both ends at the same angle can leave one edge sticking out. A clean joint needs cuts that account for both widths, not just the corner. Here’s how to miter two boards of different widths, with a diagram and a worked example to make the settings easier to understand.
Unit Converter includes a dedicated Flat Miter mode inside its Construction Calculator. It brings the two board widths, joint angle, and separately labeled results together on your phone. Unit Converter is free to download for Android, iPhone, and iPad.


Why two equal cuts don’t make the edges line up
Think of a frame with a wide bottom rail and narrower sides, or two flat trim pieces meeting around a corner. Both the inside and outside edges need to meet at the ends of the same seam.
Two 45° cuts work for equal-width boards at a 90° corner. When one board is wider, the same cut angle produces a longer cut face on that piece. The ends can meet at a right angle, but their edges won’t finish together.
To find miter angles for different width boards, you need three measurements: the actual width of each board and the included angle of the finished joint. The solution gives each board its own cut angle so the seam fits across both widths.
Measure the boards and the finished corner
- Width A: measure across the face of the first board, perpendicular to its long edge.
- Width B: measure the second board the same way. Use its actual width rather than its nominal lumber size.
- Joint angle: measure the opening between the two pieces in their finished position, as marked in the diagram.
Label the pieces A and B before starting. Keep those labels with your measurements and results, especially if you are preparing several corners. For an existing corner, use the measured angle rather than assuming it is exactly 90°.
Example: 10-inch and 15-inch boards at a 120° joint
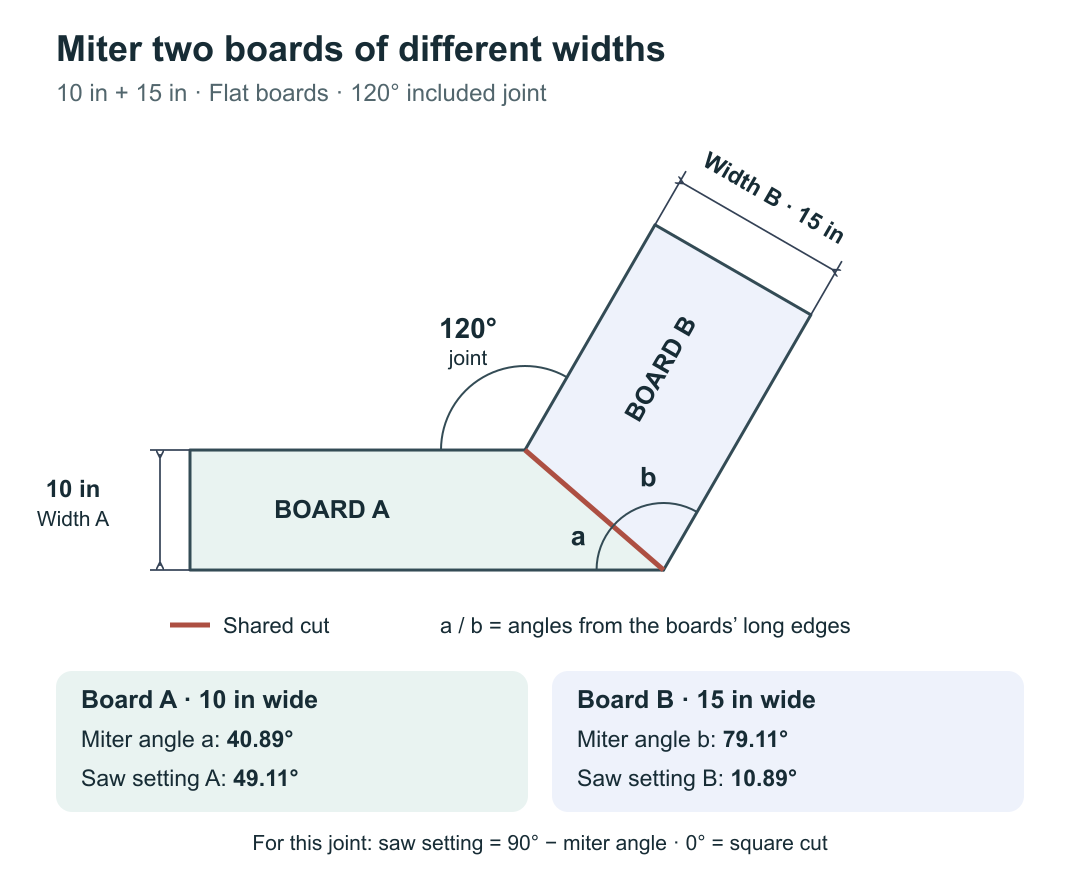
In the diagram, Board A is 10 inches wide and Board B is 15 inches wide. They meet at an included angle of 120°. The correct angles for this layout are:
| Piece | Width | Miter angle from the long edge | Saw setting from square |
|---|---|---|---|
| Board A | 10 in | 40.89° | 49.11° |
| Board B | 15 in | 79.11° | 10.89° |
The narrower board gets the more angled cut relative to a square crosscut; the wider board gets the shallower saw setting. Those different cuts produce matching seam lengths. Simply splitting the 120° joint into equal halves would not account for the different widths.
The angles depend on the width ratio and joint angle. A 10 cm board and a 15 cm board at the same corner therefore need the same angles. You can see that metric example in Omni Calculator’s worked calculation.
Miter angles and miter saw settings are different
A miter angle in this diagram is measured between the cut line and the board’s long edge. On a miter saw whose 0° position makes a square crosscut, the saw setting measures how far you turn away from that square cut.
For this example, subtract the geometric miter angle from 90°:
- Board A: 90° − 40.89° = 49.11° saw setting.
- Board B: 90° − 79.11° = 10.89° saw setting.
Use the miter saw settings when reading that type of saw scale, and keep each value with its matching board. The angle magnitude does not tell you whether to swing the saw left or right; that follows the orientation of the piece and your marked cut line.
Use an unequal width miter calculator on your phone
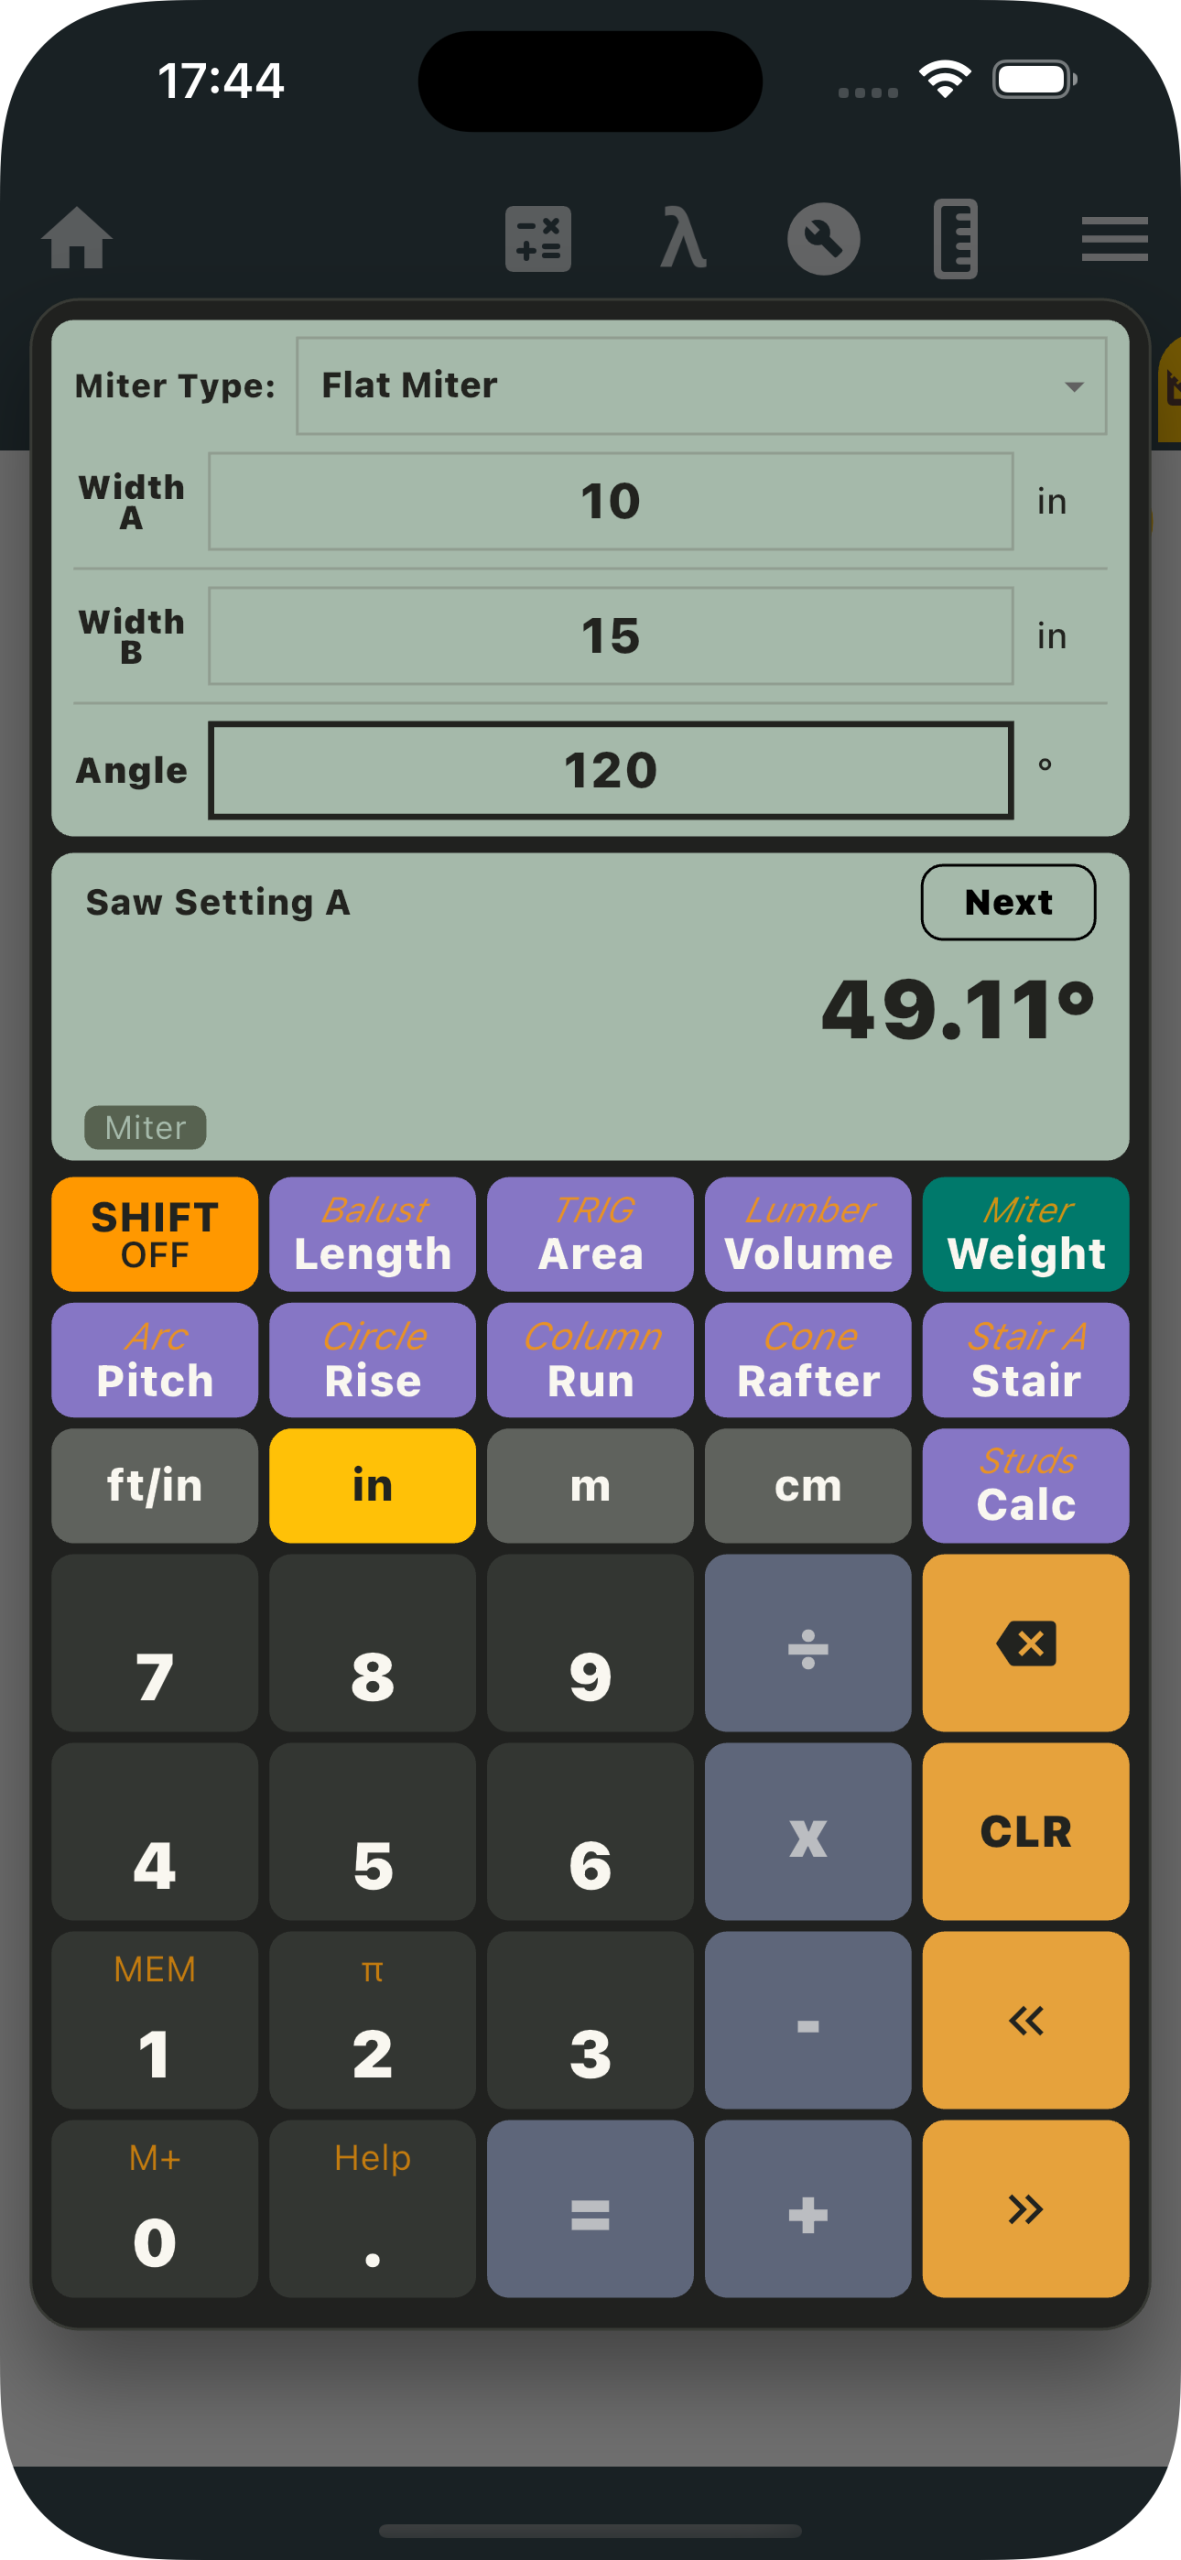
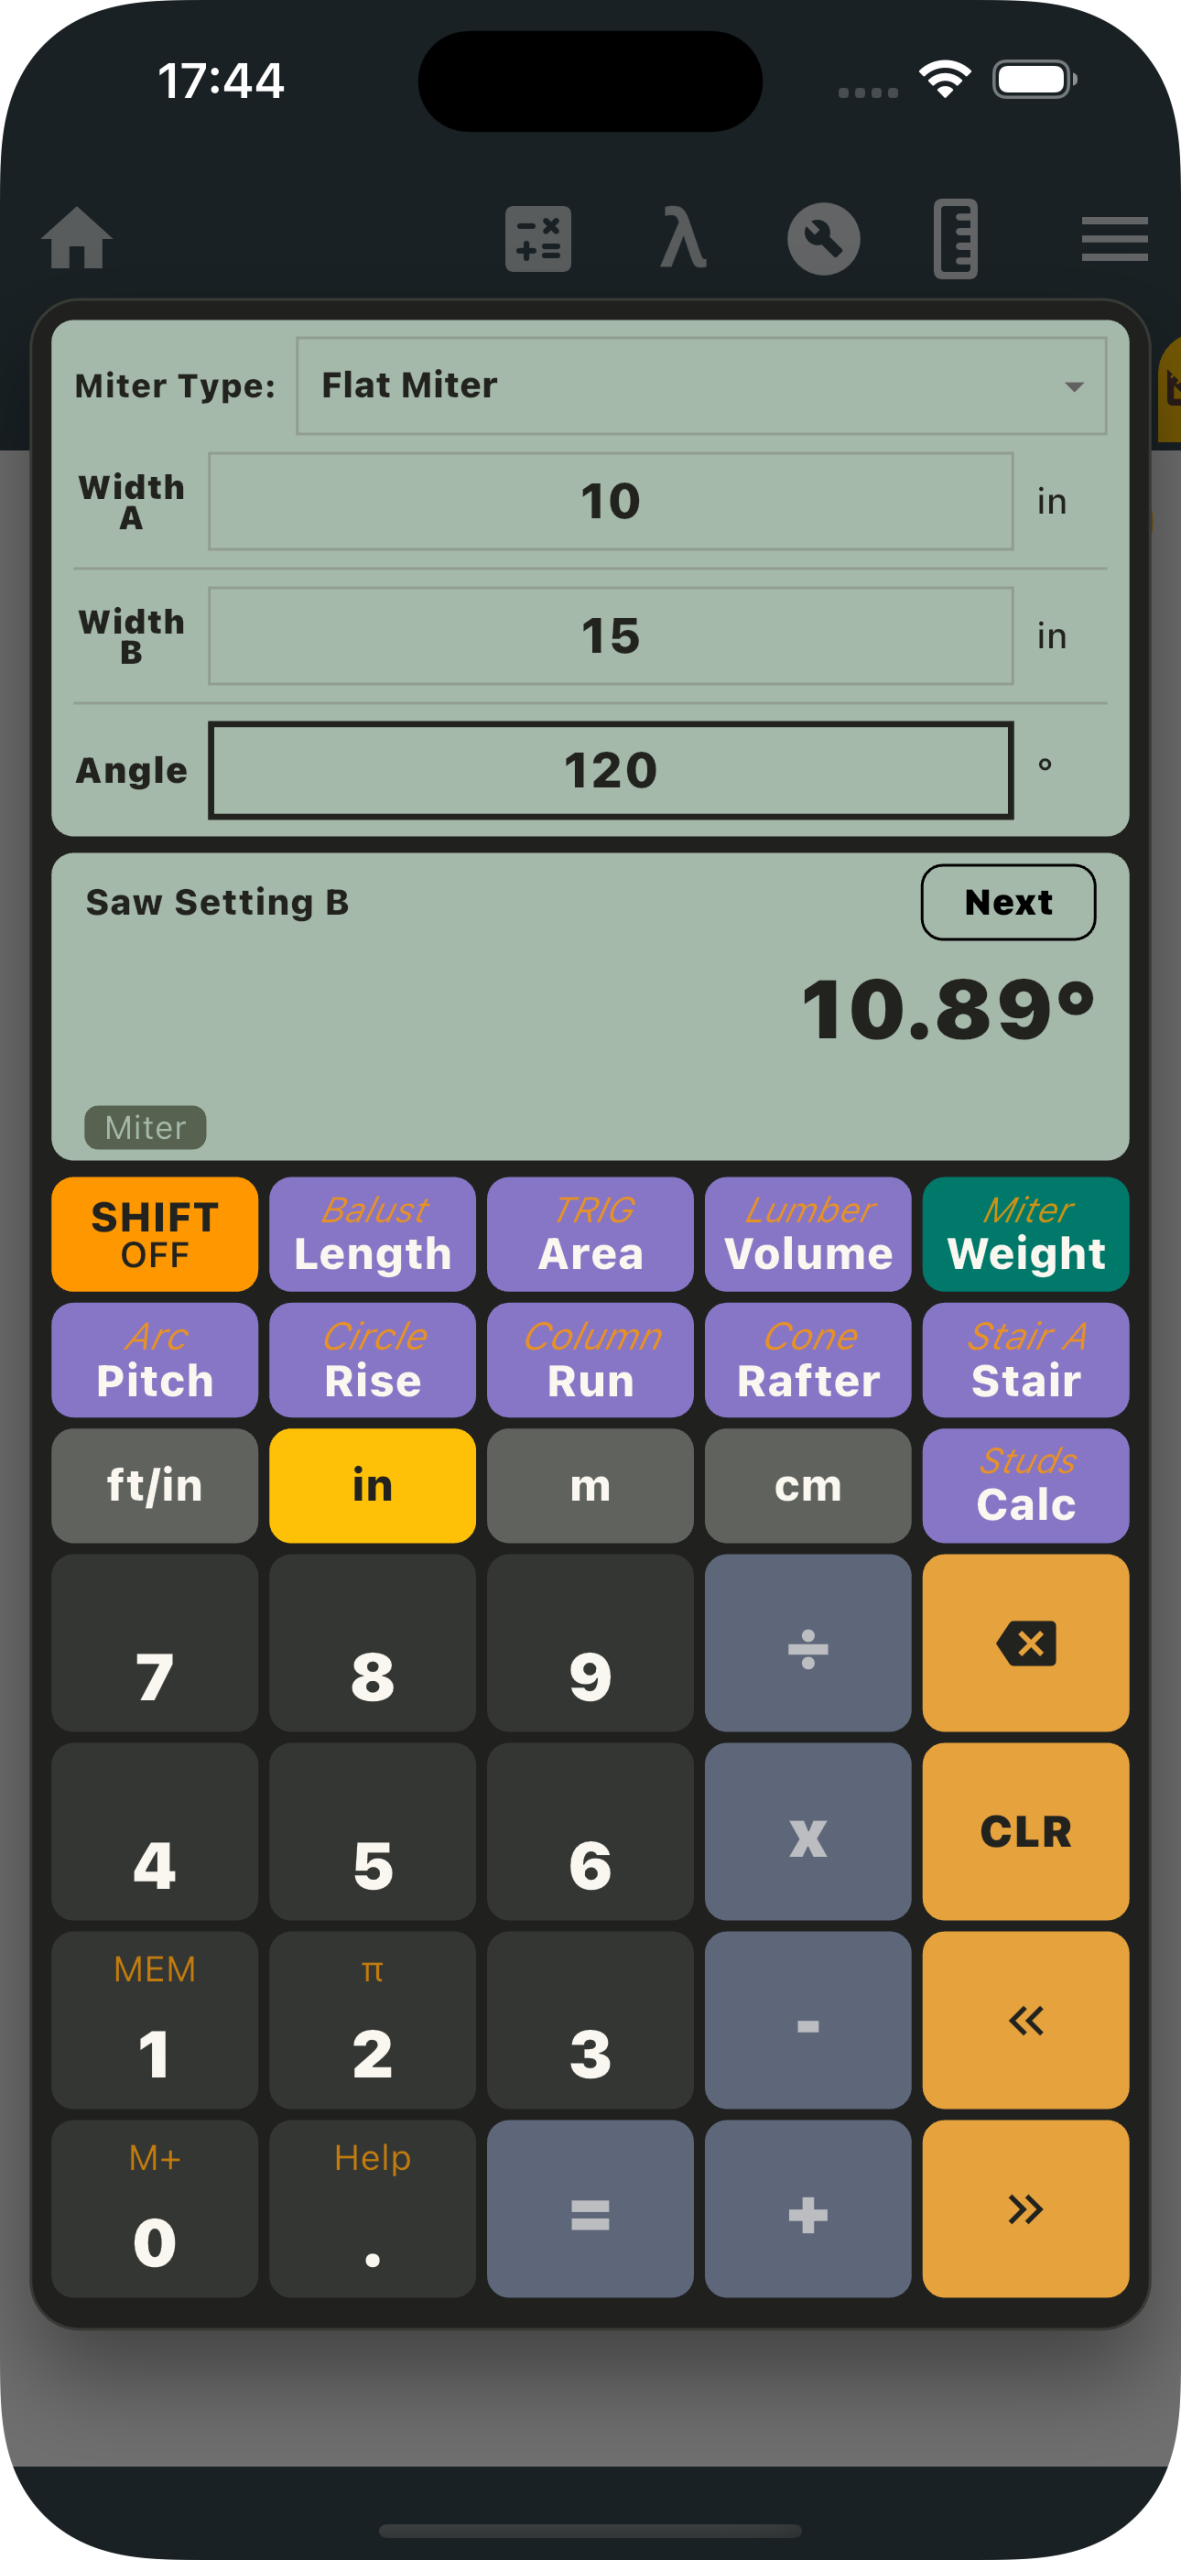
Flat Miter puts the measurements and results in one place, which is useful when you are moving between a layout, your boards, and the saw. To open the tool in Unit Converter:
- Open Construction Calculator.
- Press Shift, then Weight to open Miter.
- Select Flat Miter.
- Enter Width A, Width B, and the finished joint angle in the Angle field.
- Use Next to move through the separately labeled saw settings, miter angles, and joint angle.
The separate result labels help you distinguish a geometric cut angle from a saw-scale setting. You can also return to the inputs when the next pair of boards has different widths or meets at another corner.
Check the fit before cutting your finished pieces
Mark each board’s finished face, orientation, and cut line. Test the joint on suitable scrap with the same widths, then bring the pieces together at the measured corner. Check that both ends of the seam meet, not only that the overall angle looks right.
Choose equipment with the capacity for the board width and required angle, support the material, and follow your saw manufacturer’s setup and safety instructions. A test fit lets you account for the actual corner and material before committing to the finished lengths.
Frequently asked questions
Can I miter different-width boards at a 90° corner?
Yes. The two boards need different cut angles when both edges are to meet flush. Two 45° cuts are the equal-width solution, not the general solution for every right-angle joint.
Do I enter the joint angle or the saw angle?
Enter the included angle of the finished joint in the Angle field. The saw setting is a result, not that input. In the worked example, the input is 120°, while the two saw settings are 49.11° and 10.89°.
What if the boards are the same width?
The two geometric miter angles are equal. At a 90° joint, each is 45°, with a 45° saw setting. At a 120° joint, each geometric angle is 60°, with a 30° saw setting measured from square.
Which tool should I use for crown molding?
For crown molding installed at a spring angle, use the app’s Crown / Compound mode. Our crown molding angle calculator article explains the spring and wall angles, along with the flat and nested cutting settings.
Plan your next miter joint with Unit Converter
Measure both widths, identify the finished joint angle, and keep each result with the right piece. For more tools to use alongside Flat Miter, explore Unit Converter’s Construction Calculator.
Download Unit Converter on Google Play for Android, or get Unit Converter on the App Store for iPhone and iPad.