A useful bead pattern PDF should do more than place a picture on a page. When you sit down with your beads, it should tell you which colors you need, where each bead belongs, which direction to work, and where to mark your progress.
This guide shows how to turn a finished design into a printable bead pattern using Bead Designer in Knitting Row Counter. The example uses a Peyote 1-Drop honeycomb bracelet and produces a document with project details, a bead list, a numbered chart, pickup sequences, and completion checkboxes.



What a useful bead weaving pattern PDF should include
A clear document brings the design and the working details together. Before creating your PDF, think about what you will want beside your bead mat:
- the design name, beadwork technique, dimensions, and approximate finished size;
- a preview of the complete pattern;
- a bead list with colors and quantities;
- a numbered pattern with optional bead letters;
- pickup sequences with working-direction arrows;
- checkboxes for marking completed rows or pickup phases.
Keeping these details in one document means you can check the overall design, prepare the correct colors, and follow the pattern without creating separate notes.
Who can use a printable bead pattern PDF?
Printable PDFs are useful for personal projects, but they can also help independent bead designers, digital pattern sellers, kit makers, and workshop instructors prepare patterns for other people. If you sell or teach from your own original designs, you can add your name or brand and a short note, then bring the pattern preview, dimensions, bead list, numbered chart, and row-by-row pickup pages together in one consistent document for customers or students.
1. Start with the finished bead design
Open the design you want to prepare for printing and check its basic setup first. The project’s technique, bead profile, width, and row count become part of the document information. If the pattern still needs changes, finish those edits before generating the instructions.
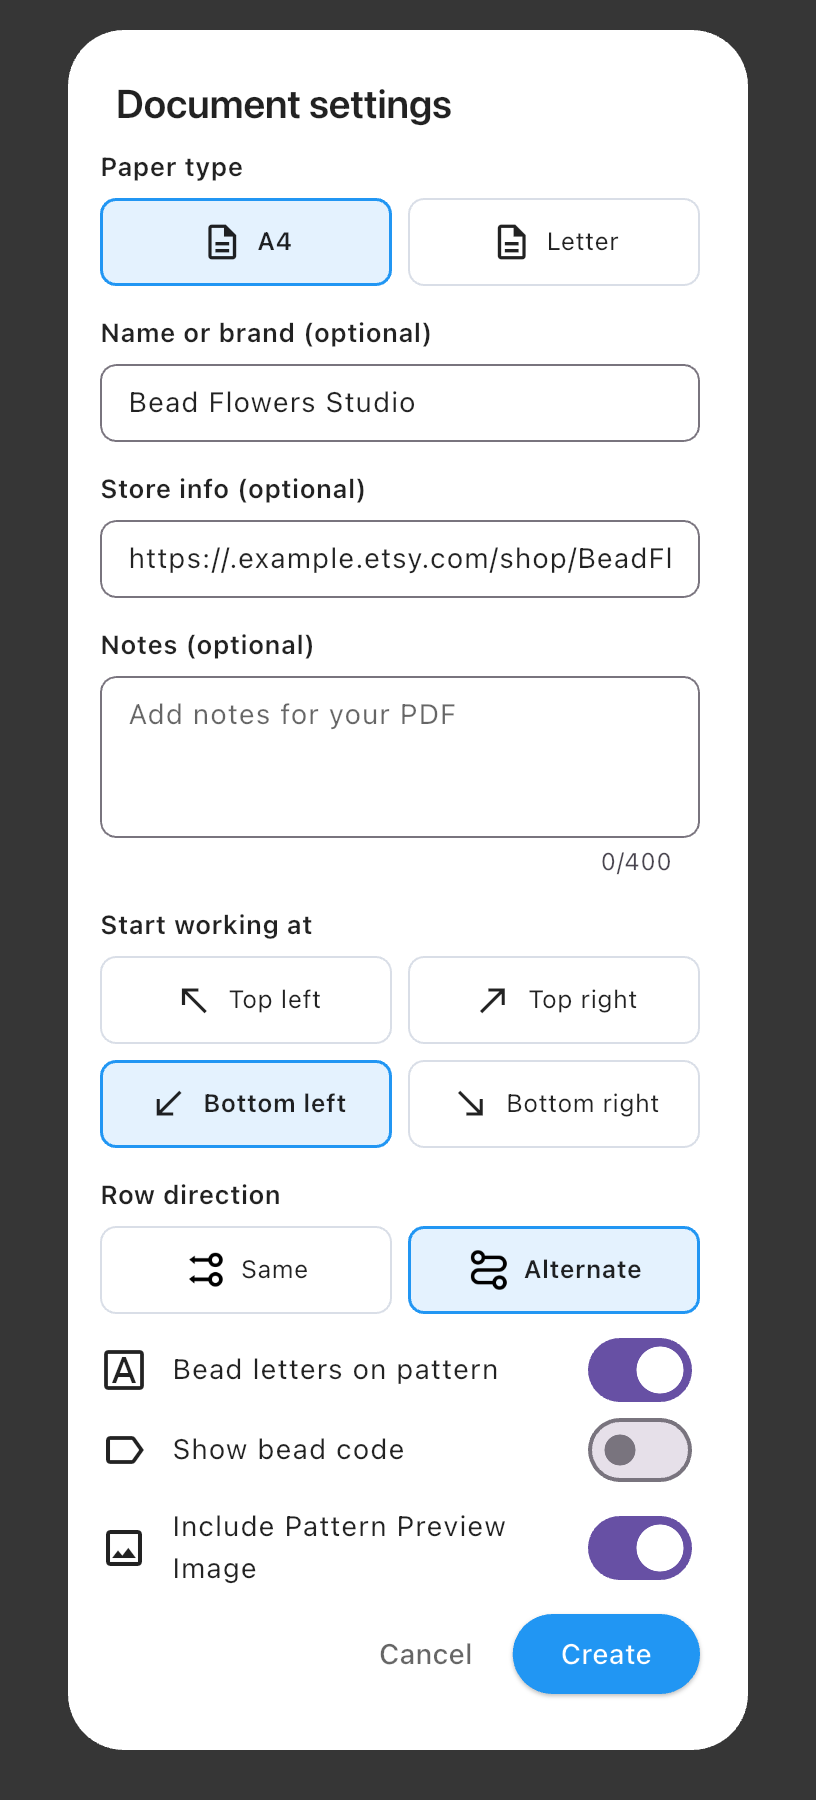
Enter Work mode and select Instructions from the top toolbar using the PDF icon. On the Instructions screen, open Document settings to configure the file.
If your design began as a photo or illustration, see how to turn an image into an editable bead pattern before preparing the PDF.
2. Choose A4 or US Letter paper
Choose the paper format you plan to print: A4 or US Letter. You can also add an optional creator name or brand and a short note. These fields are useful for identifying a project, recording preparation details, or adding a message to instructions you are keeping or sharing.
3. Set the starting corner and row direction
A Peyote pattern PDF should follow the same path you intend to use while beading. Select a starting corner—top left, top right, bottom left, or bottom right—then choose a same or alternating row direction.
For Peyote 1-Drop and Peyote 2-Drop designs, you can also select Normal or Speed mode for the document. These PDF choices can be configured without changing the Work mode settings already saved with the project.
4. Choose what appears in the PDF
Turn bead letters on when you want every bead position identified by a simple letter. You can also include bead reference codes and a pattern preview image. The best combination depends on how you read patterns: some people rely mainly on color, while others prefer letters and codes as an extra visual check. When the options are ready, tap Create to generate the document preview.
5. Review the overview and bead list
After tapping Create, begin with the overview page. In the Honeycomb example, it records Peyote 1-Drop, Cylinder 11/0, 19 beads across, 84 rows, the approximate finished size, 1,596 total beads, and two colors. It also states the chosen starting corner, row direction, and Peyote mode.
The pattern preview shows the complete design, while the bead list separates Navy and Golden Yellow and gives a quantity for each. This makes the first page useful both as a project summary and as a bead-preparation checklist.
6. Use the numbered pattern pages
The numbered chart provides a visual map of the design. Row numbers help you locate a section, and optional bead letters make color positions easier to identify when shades are similar or when the page is printed without perfect color reproduction.
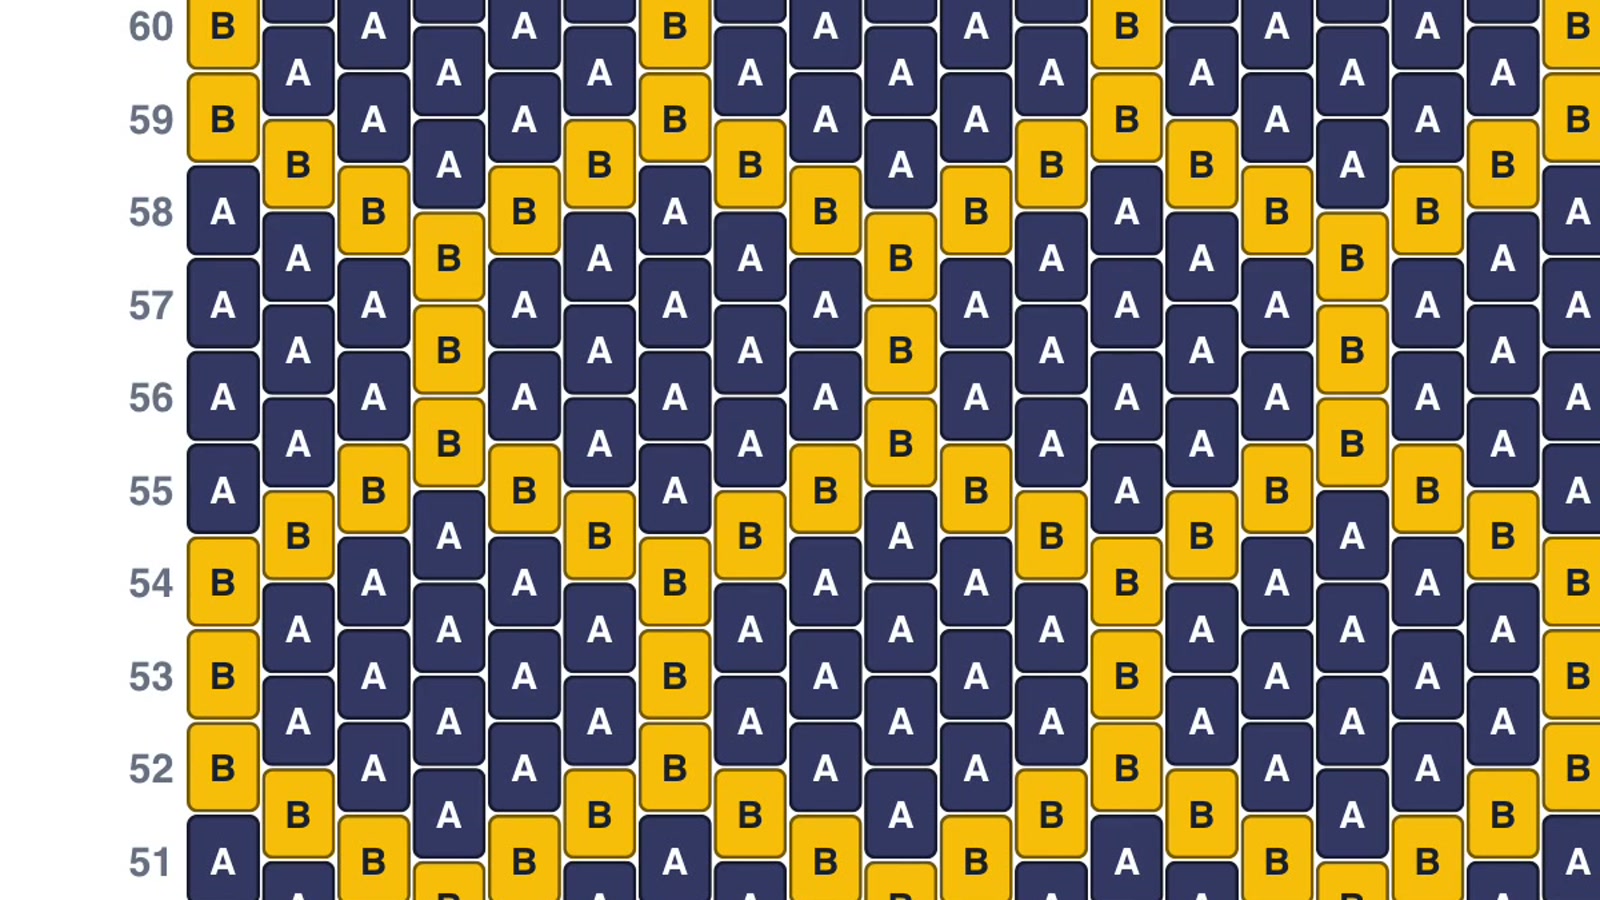
For a long bracelet, the pattern is divided across pages while keeping the numbering visible. Use the page navigation to review each section before saving or printing the document.
7. Follow the row-by-row bead instructions
The row-by-row bead instructions turn each working step into a readable sequence. Every line shows the row, working direction, color order, and grouped bead quantities. The arrow makes the reading direction clear, while repeated colors are grouped to reduce unnecessary counting.
A checkbox appears beside each line, giving you a simple way to mark completed work on paper. This is especially helpful when a row contains repeated colors or when you stop partway through a longer project.

8. Save the completed PDF
Review the document pages, then use the Save control in the Instructions screen. Choose the destination and filename in the save dialog. After the file is saved, the app returns to the instruction preview, so you can continue reviewing the pages or return to Work mode.
Printable bead pattern PDF checklist
- Finish editing the bead design.
- Choose A4 or US Letter paper.
- Add an optional name, brand, or project note.
- Select the starting corner and row direction.
- Choose the Peyote mode when applicable.
- Decide whether to show bead letters, codes, and the preview image.
- Review the overview, bead list, numbered chart, and pickup pages.
- Save the completed PDF for printing.
If you prefer to work directly from the screen, you can also learn how to keep track of rows in a peyote stitch pattern with Work mode.
Frequently asked questions
Can I create the PDF in A4 and US Letter sizes?
Yes. The document settings provide both A4 and US Letter paper options.
Can I create printable seed bead patterns from my own designs?
Yes. Finish the design first, then create a PDF containing the project information, bead list, numbered pattern, and row-by-row instructions selected in Document settings.
Is this useful for bead pattern sellers?
Yes. When you are preparing an original pattern you created, the PDF can combine your name or brand, a project note, design preview, bead quantities, optional reference codes, numbered chart, and pickup instructions. Review the complete document before adding it to a digital pattern listing or including it with a kit.
Does the bead pattern PDF include bead counts?
Yes. The overview can include a bead list with each color and its quantity, along with the total number of beads used by the design.
Can the numbered pattern show bead letters and codes?
Yes. Bead letters and bead reference codes can be included through the document settings.
Can I choose which corner the instructions start from?
Yes. You can choose any of the four starting corners and select a same or alternating working direction.
Do the pickup instructions include checkboxes?
Yes. Each row or pickup phase can have a checkbox so you can mark it after completing that step.
Create instructions for your next beadwork project
Bead Designer keeps pattern creation, printable instructions, and guided Work mode together inside Knitting Row Counter. Create your next bead pattern PDF with Knitting Row Counter on the App Store or Google Play.