Moving from an image to a bead pattern is most useful when the result becomes a working design, not just a pixelated picture. For Loom, Peyote, or Brick Stitch beadwork, you need a pattern arranged for the technique, with clear colors and individual cells you can continue editing.
If you are wondering how to turn a picture into a bead pattern, Bead Designer in Knitting Row Counter lets you position the picture on a Loom, Peyote, or Brick Stitch grid, preview how it will be mapped, control the color count, and convert it into an editable design. This walkthrough follows the complete process using geometric artwork and a Peyote 2-Drop bracelet.


Choose a picture that will translate clearly
A bead grid turns an image into a fixed number of cells, so the most important visual choices should be easy to recognize. Pictures with clear shapes, distinct color areas, and a strong subject are especially useful starting points. Geometric artwork, symbols, illustrations, and high-contrast photos can all work well.
Before importing the image, decide which part matters most. Remove distracting edges from the composition and let the main subject fill the area you want to bead. This gives the pattern more space to preserve the shapes that make the picture recognizable.
1. Create the beadwork project first
Start by choosing the structure the finished design will use. Bead Designer supports Loom, Peyote 1-Drop, Peyote 2-Drop, Brick 1-Drop, and Brick 2-Drop layouts. Each option creates a canvas arranged for that technique rather than placing every design on the same square grid.
Set the project dimensions and bead profile before transferring the image. The number of beads across and the number of rows determine how much visual information the grid can hold. They also affect the approximate finished size shown for the selected bead type and technique.
2. Import, position, and crop the image
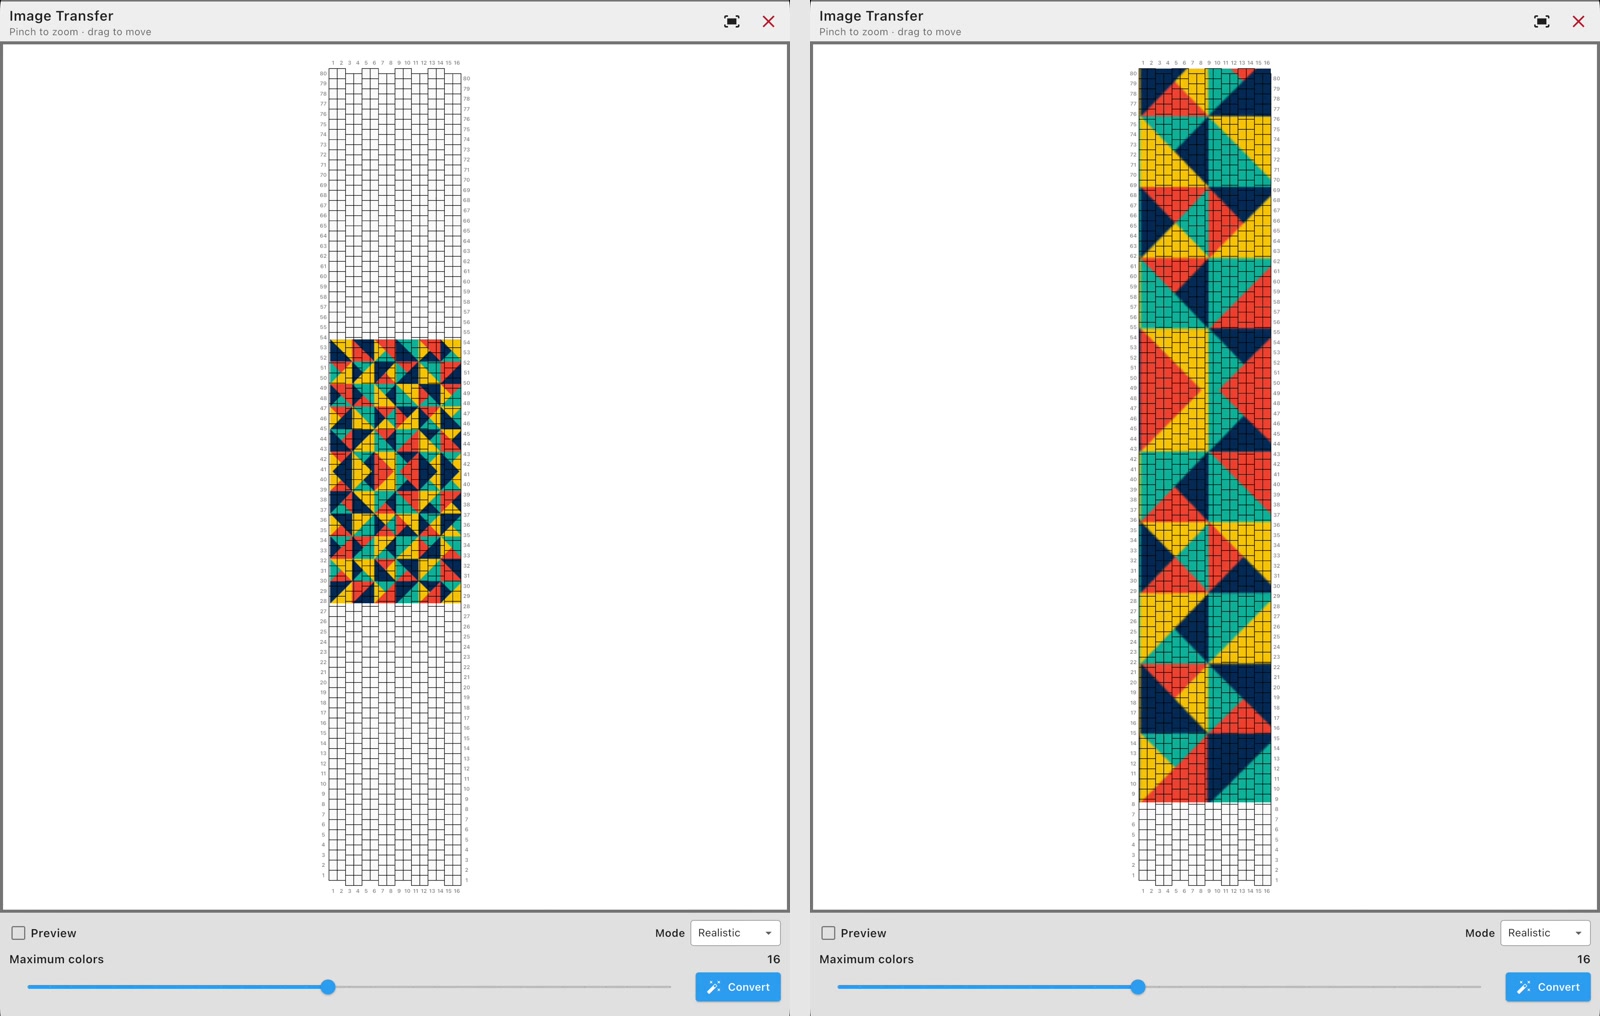
Open Image Transfer from the design editor and choose the photo or illustration you want to use. The picture appears over the numbered bead grid. Pinch to zoom and drag to move it until the important part of the composition sits inside the design.
In the example below, the picture first covers only the middle of the bracelet. It is then enlarged and aligned across almost the full pattern. This positioning step controls which part of the source becomes the bead design, so take a moment to check the top, bottom, and side edges before converting.
3. Preview the image to bead pattern conversion
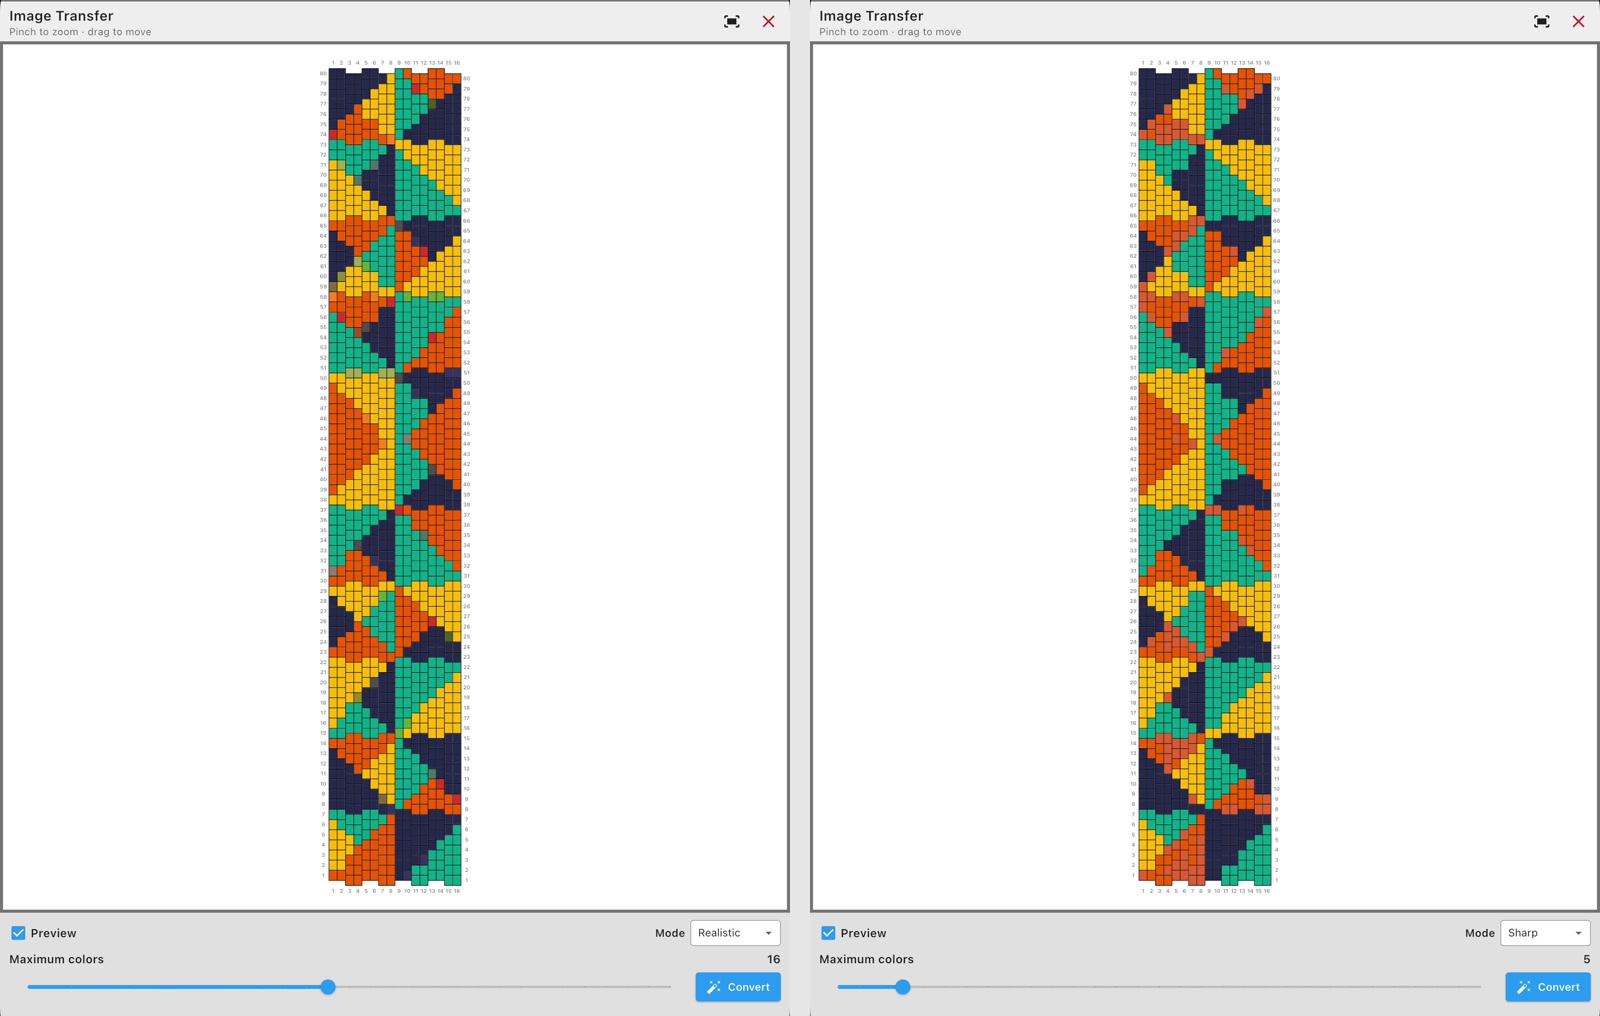
Turn on Preview to see the picture mapped onto the actual bead grid. You can compare the available sampling modes and adjust the maximum number of colors while the preview updates. This makes it possible to explore different interpretations before applying the transfer.
The example compares a Realistic preview using up to 16 colors with a Sharp preview using five. The first keeps more color variation, while the second creates broader, more defined color areas. There is no single number that suits every picture: use the preview to find the balance that fits your design and the palette you want to work with.
4. Convert an image to a bead pattern you can edit
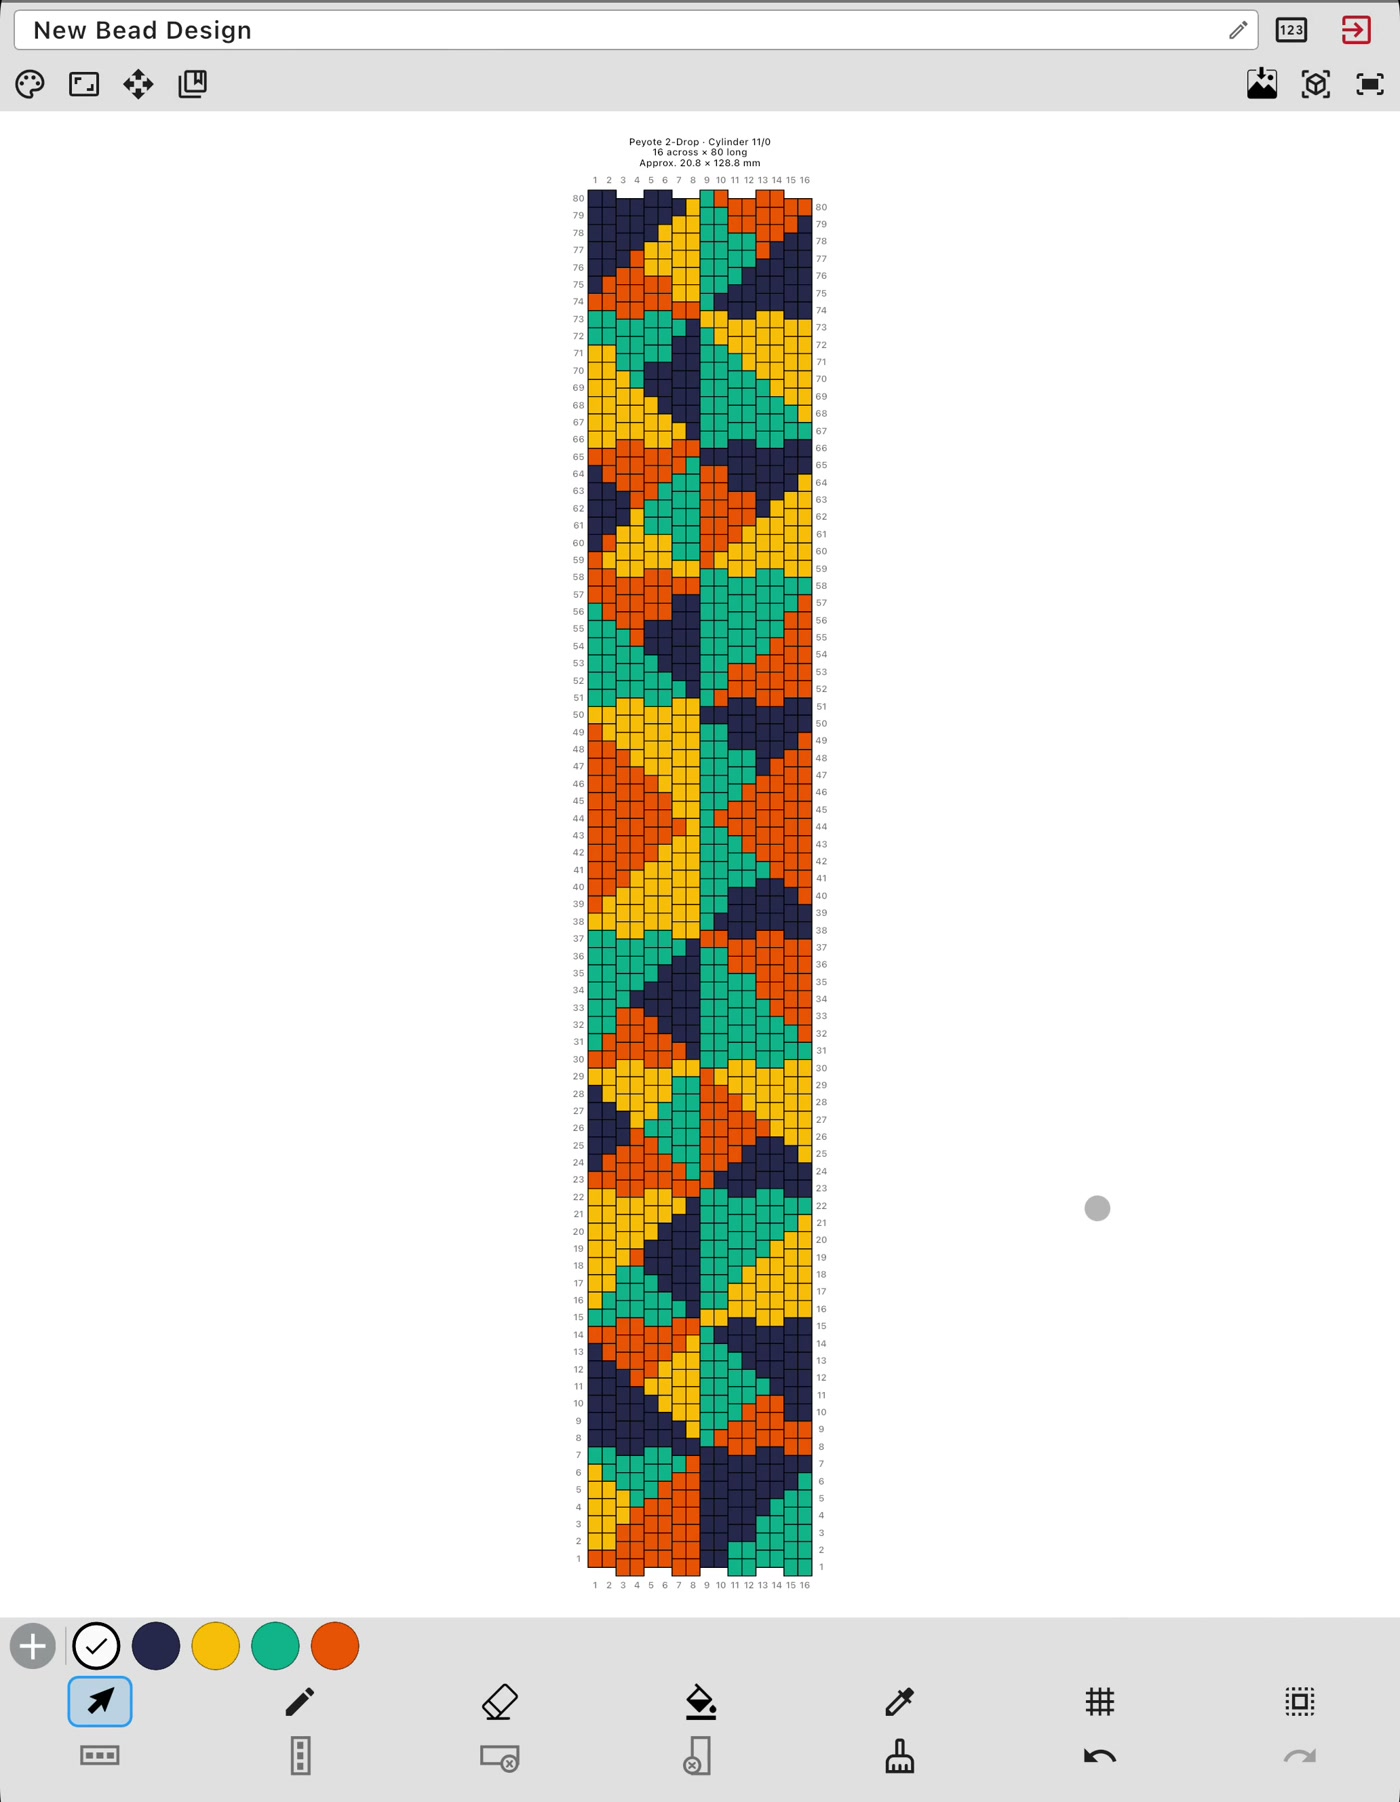
When the preview looks right, select Convert. The mapped picture returns to the main editor as a bead pattern, and its colors appear in the project palette. It is not flattened into a finished image: the individual beads remain editable.
You can now refine the result with the normal design tools. Change a bead with the pencil, clean up an edge with the eraser, fill a larger area, or use the eyedropper to continue with a color already in the design. This is where a quick image conversion becomes a pattern that reflects the details you want to keep.
5. Inspect the result in 2D and 3D
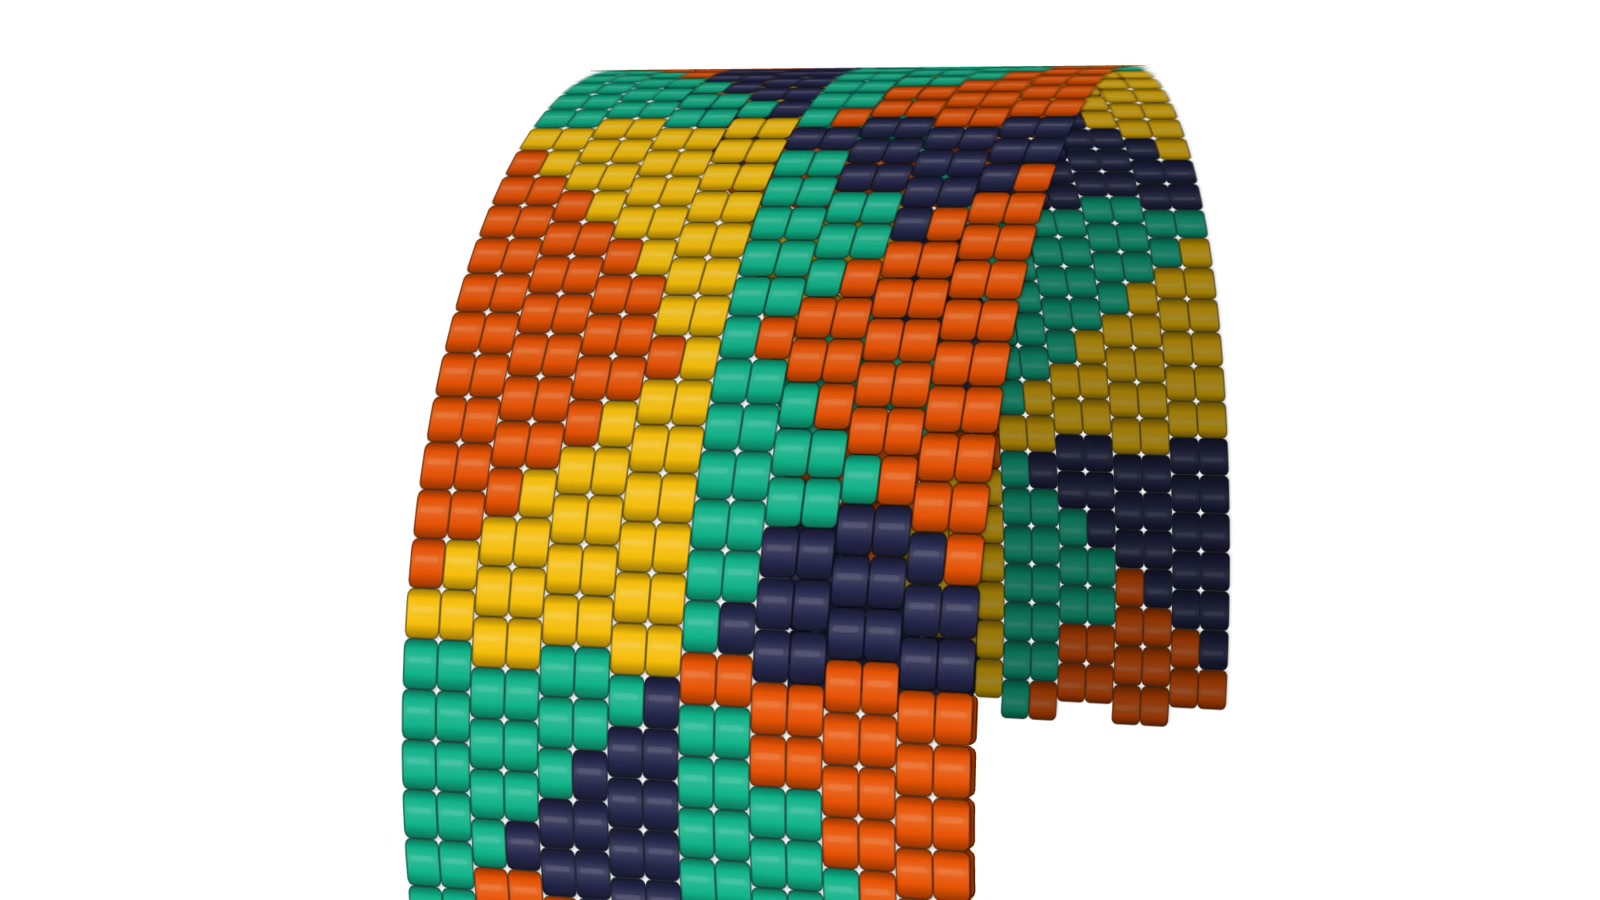
Open Preview to check the converted pattern as rendered beads. The flat 2D view is useful for examining the complete layout and zooming into small details. For a bracelet-style design, switch to the curved 3D view to see how the colors and shapes continue around the bend.
You can adjust the bend, rotate the bracelet, and inspect it from different angles. If a border, color area, or transition needs attention, return to the editor and adjust the individual beads before you begin working from the pattern.
A quick image to bead pattern checklist
- Choose the Loom, Peyote, or Brick Stitch layout you plan to use.
- Set the project dimensions and bead profile.
- Import your photo or illustration.
- Scale and position the important part inside the grid.
- Turn on Preview and compare the sampling and color settings.
- Convert the image when the mapped version looks right.
- Refine individual beads and colors in the editor.
- Inspect the finished pattern in 2D and 3D.
Once the design is ready, you can keep it connected to the rest of the project. When you begin beading, this guide explains how to keep track of rows in a peyote stitch pattern.
Frequently asked questions
Can I convert an image to a seed bead pattern?
Yes. You can import either as the starting point, then position, preview, and map it onto the bead grid.
Which beadwork layouts can I use?
Bead Designer supports Loom, Peyote 1-Drop, Peyote 2-Drop, Brick 1-Drop, and Brick 2-Drop patterns.
Can I control how many colors the conversion uses?
Yes. The Image Transfer screen includes a maximum-colors control, and the mapped preview updates as you adjust it.
Can I edit the bead pattern after converting the image?
Yes. The converted result remains fully editable, so you can adjust colors and individual beads in the design editor.
Can I preview an image-based bracelet before beading it?
Yes. You can inspect the pattern in a flat 2D view or use the curved 3D view to rotate a bracelet-style design and adjust its bend.
Turn your next picture into a beadwork project
Bead Designer keeps image transfer, editing, previewing, and pattern-following together inside Knitting Row Counter. Try it with your own photo or illustration on the App Store or Google Play.