A good bead pattern editor should let you change more than one bead at a time. When a border, block, motif, or complete half-design already exists, selected-area tools can help you fill, rotate, copy, move, and mirror that work without drawing every cell again.
This guide begins with a simple 6 × 6 block to make each action easy to see. It then applies the same workflow to Harmony Swirls, where one completed half is copied and mirrored into a full design using Bead Designer in Knitting Row Counter.



What selected-area tools add to seed bead design software
Drawing bead by bead is useful when you are inventing a shape. Once that shape is established, the job often changes: you may need to recolor a region, duplicate a detail, turn it, or create a balanced opposite side. This is where practical seed bead design software can make editing feel much more direct.
Bead Designer keeps the actions connected to the grid. First select the cells you want to work with. The selection toolbar then provides actions for filling or erasing the area, copying it, rotating a square selection, and mirroring it horizontally or vertically. Copied and transformed content can be dragged to the position you choose before placement is confirmed.
Edit bead patterns on iPad, iPhone, or Android
Bead Designer is available inside Knitting Row Counter for iPad, iPhone, and Android. A tablet gives you more room to inspect a large grid, while a phone is handy for quick edits and checking details. On either, you can use the selection, fill, copy, rotate, and mirror tools covered in this guide.
1. Select the exact area you want to edit
Choose the area-selection tool and drag across the grid. A blue rectangle marks the current selection, and its size appears above it while you adjust the corners. In the simple example, the selected region is 6 × 6 cells.

The displayed dimensions are useful when you want matching blocks or a precise motif boundary. If the first drag is slightly too large or small, adjust the selection until it contains exactly the cells you intend to transform.
2. Fill a selected area with one bead color
With a color active in the project palette, open the selection actions and choose Fill selected area. Every cell inside the rectangle receives that color at once.
The demonstration fills the complete 6 × 6 square with blue. A smaller inset selection is then filled with green, leaving the original blue around the edge. Two quick fills create a clean bordered block that would take many separate pencil taps to draw.

Area fill is useful for backgrounds, solid geometric elements, wide stripes, framed color blocks, and any section where the same bead color occupies a continuous region.
3. Rotate a square part of the pattern
Select the completed square and use Rotate selected area 90° clockwise. Each tap turns the selected content by another 90-degree step while keeping it inside the square selection.
The bordered block makes the change easy to recognize because its blue edge moves to a new side. This can be useful for turning corner pieces, redirecting an angled motif, or creating several orientations from one square design element.
4. Copy, move, and place an edited area
Use the copy action when you want to preserve the original and create another instance. The copy appears as an active selection that can be dragged to a new grid position. Move it into place, apply another 90-degree clockwise step if needed, and confirm the placement when the arrangement looks right.
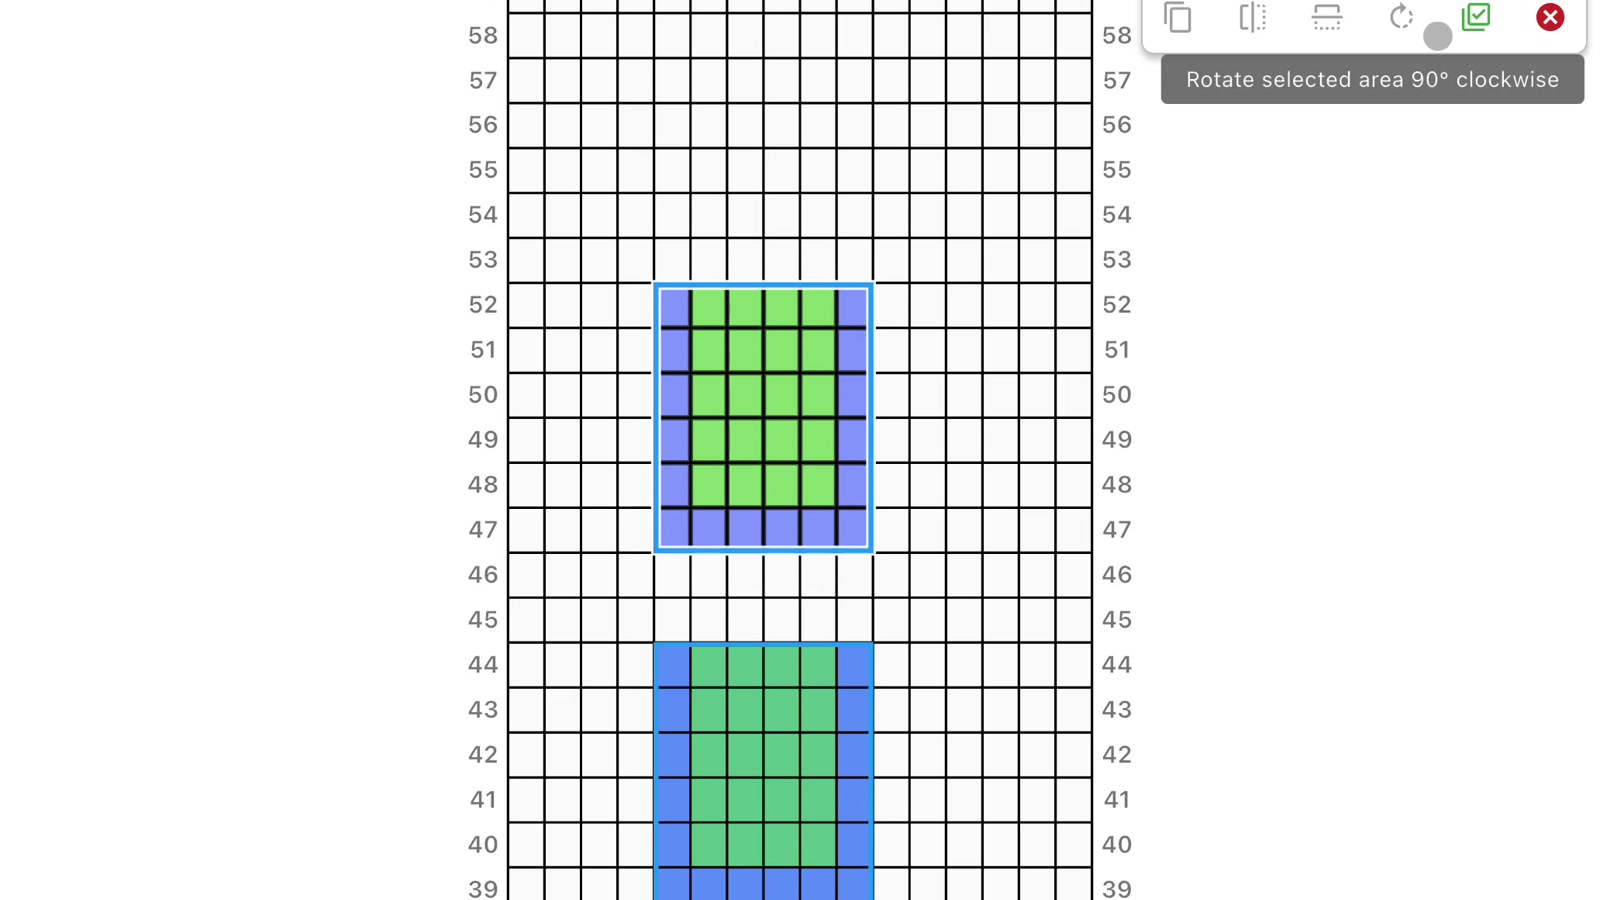
In the example, the original bordered block remains below while its copied version is moved above and rotated. This makes it easy to compare the source and transformed copy before committing to the layout.
5. Mirror a bead pattern area
To mirror a bead pattern, select the part you want to reflect and choose either the horizontal or vertical mirror action. The colors and bead positions are reversed inside the selected area, giving you a reflected version that can be moved and placed elsewhere on the grid.
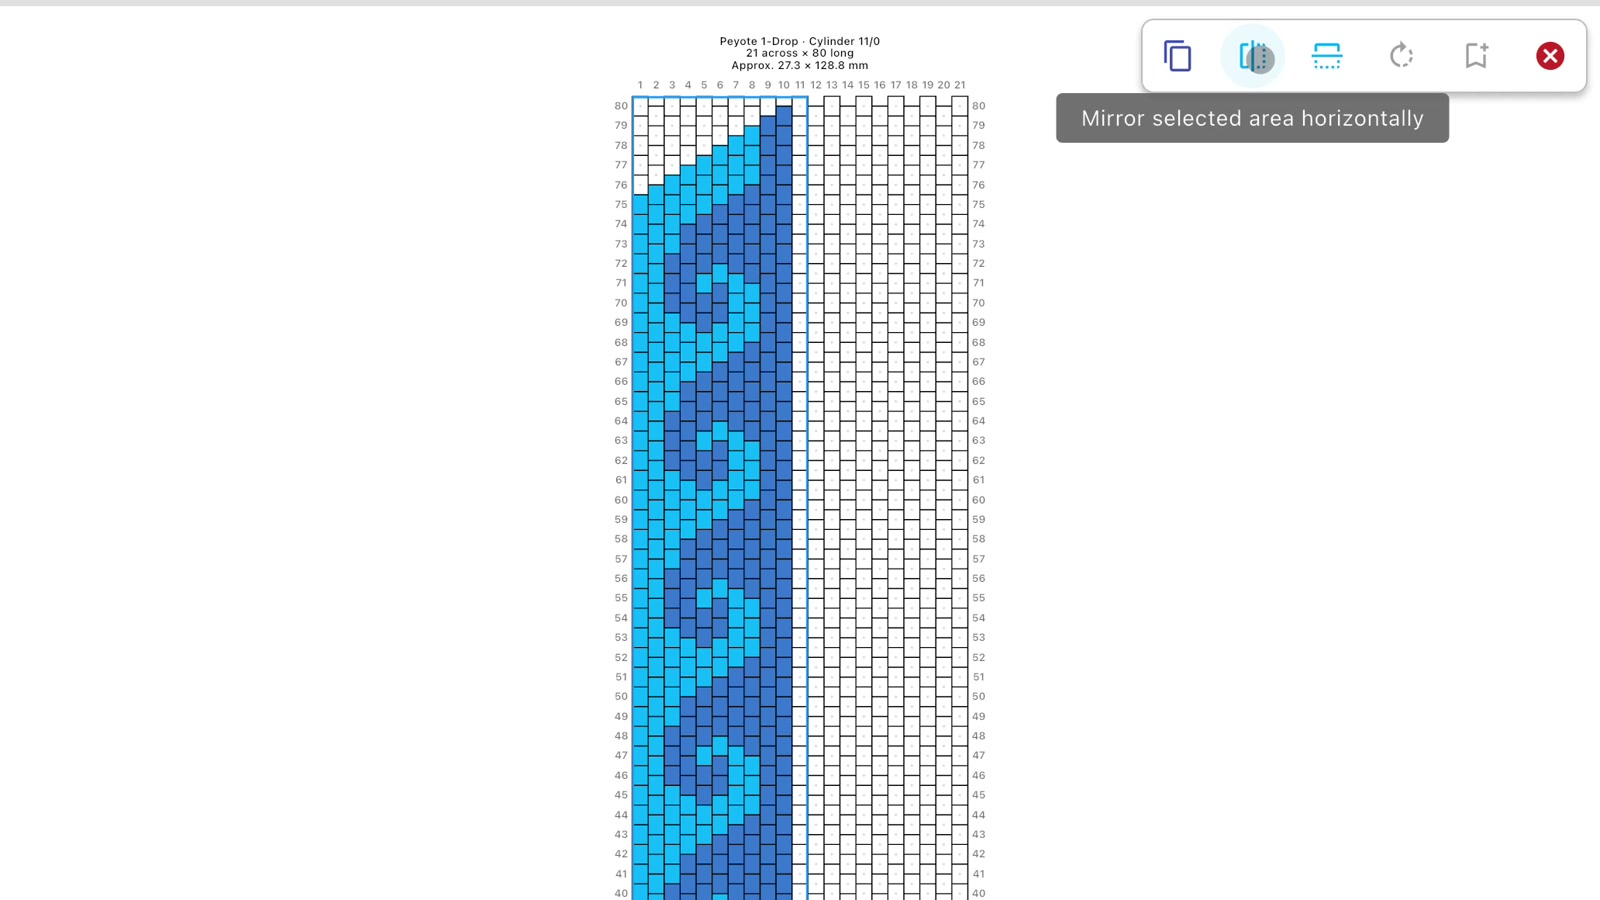
Horizontal mirroring is useful for creating a left and right pair. Vertical mirroring can turn an upper detail into a matching lower detail. Because you choose and position the selection yourself, the same controls can support compact motifs as well as much larger design sections.
From one half to a symmetrical bead pattern
The Harmony Swirls example shows how the mirror workflow scales beyond a small practice block. The starting design occupies one side of a 21 × 80 Peyote 1-Drop canvas. Its completed half already contains the full dark-blue and turquoise swirl arrangement.
The entire half is selected as a 12 × 80 area, copied, and mirrored horizontally. The reflected copy returns inside a movable selection, ready to be dragged beside the original.
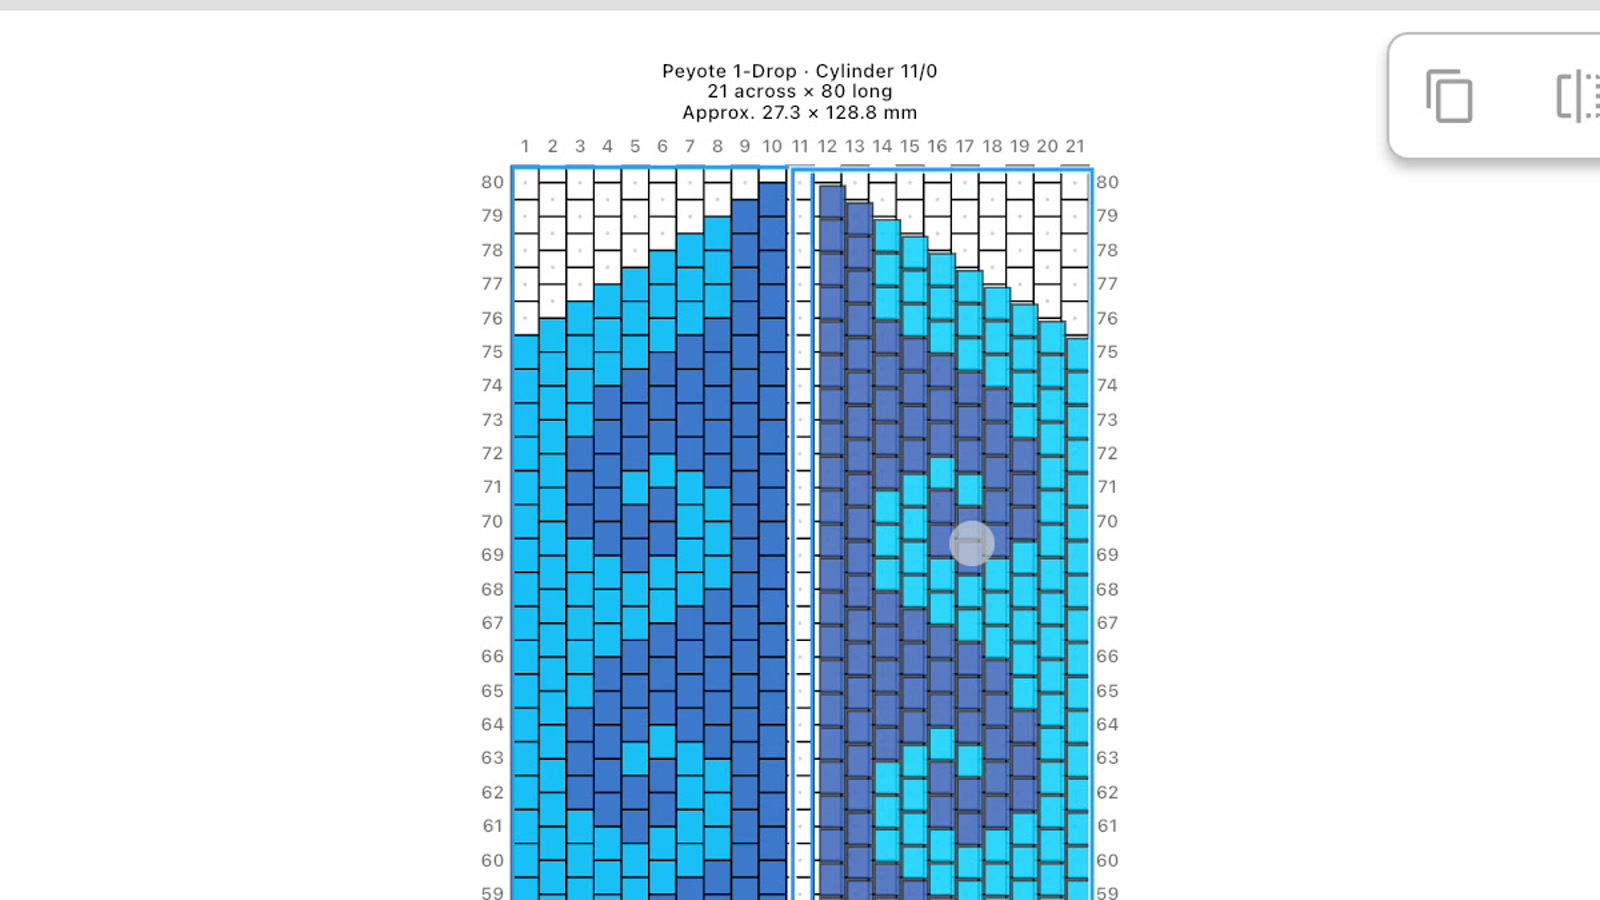
After the two sides are aligned on the technique-aware grid, the placement is confirmed. The result is a full symmetrical bead pattern with matching swirls on both sides of the center.

This is a useful approach for original bracelet bands, centered geometric layouts, paired borders, and other designs where the second half should reflect the first. You can concentrate on refining one side, then use copy, mirror, and manual placement to build the balanced full composition.
Choose the right selection action for the job
- Fill when a complete region needs the active bead color.
- Erase when selected cells should become empty or transparent.
- Copy and move when the original should remain and the same detail is needed elsewhere.
- Rotate when a square design element needs a 90-degree change in direction.
- Mirror horizontally when you need a reflected left or right counterpart.
- Mirror vertically when you need a reflected upper or lower counterpart.
For pattern designers and sellers, these tools can speed up the careful parts of preparing original designs: making balanced bracelet sides, arranging coordinated elements, testing alternate orientations, or adapting a motif across a small collection. The transformed areas remain editable, so the duplicated structure can still be refined with individual bead and color changes.
A reliable selected-area editing workflow
- Zoom to a comfortable view of the section you want to change.
- Drag a selection around the complete design area.
- Check the displayed width and height before applying an action.
- Choose fill, erase, copy, rotate, or a mirror direction.
- Drag copied or transformed content to the intended position.
- Check its alignment against the surrounding grid.
- Confirm the placement, then inspect the overall design.
Frequently asked questions
How can I edit a bead pattern without changing every bead separately?
Select the complete region you want to change, then use an area action such as fill, erase, copy, rotate, or mirror. This lets you edit a bead pattern in meaningful sections while retaining the option to refine individual beads afterward.
Can I see the size of a selected area?
Yes. The selection dimensions appear above the highlighted region while you drag and adjust it. The tutorial uses a 6 × 6 selection as a clear example.
How does rotation work?
A square selection can be rotated clockwise in 90-degree steps. Repeating the action gives you the other square orientations while keeping the design inside its selected boundary.
Can I mirror both small motifs and large design sections?
Yes. The examples show the mirror action on a small bordered block and on a full-height 12 × 80 half-pattern. After mirroring, drag the selected result to the position where you want it and confirm the placement.
Do selected areas stay aligned with Peyote and Brick Stitch grids?
Placement follows the structure of the selected technique, helping copied areas remain aligned correctly on staggered Peyote and Brick Stitch canvases. The same selection tools can also be used on Loom designs.
When should I use Vertical Repeat instead?
Use Vertical Repeat when you want each new edit reproduced automatically at a chosen row interval while drawing. Use selected-area tools when you already have a specific region that you want to fill, copy, turn, reflect, or move. See how to create a repeating bead pattern with Vertical Repeat for that workflow.
Edit larger sections without redrawing them
Selected-area tools let you move naturally from detailed drawing to larger structural edits. Build the important element once, select it precisely, and then fill, rotate, copy, move, or mirror it wherever the composition needs it.
For related workflows, learn how to make a seed bead pattern from scratch or see how to replace colors throughout a bead pattern.
Bead Designer combines technique-aware grids, drawing and selection tools, color editing, 2D and 3D previews, Work mode, and printable instructions inside Knitting Row Counter. Try the editor with Knitting Row Counter on the App Store or Google Play.