A repeating bead pattern can begin with one small flower, geometric shape, or color sequence. The challenge is placing that idea consistently across a longer design. Vertical Repeat in Bead Designer lets you choose a repeat interval in rows and reproduce each new edit at the corresponding position throughout the grid.
This guide uses a 16 × 120 Peyote 1-Drop design with a 12-row repeat to build a pink, yellow, and green floral bracelet. The same feature is available for the supported Loom, Peyote 1-Drop, Peyote 2-Drop, Brick 1-Drop, and Brick 2-Drop layouts in Bead Designer in Knitting Row Counter.



Why use Vertical Repeat for a repeating seed bead pattern?
When a design is much longer than its main motif, drawing every copy separately takes time and makes small placement differences more likely. Vertical Repeat divides the canvas into equal row sections. Add a bead in one section, and the same edit appears in the matching position of the other sections.
That makes a repeating seed bead pattern feel more like designing one clear unit than filling an entire bracelet cell by cell. You still decide the motif, its colors, and every bead position; the repeat feature handles the repeated placement while you draw.
1. Plan the size of the repeat
Start by thinking about the smallest section that contains the complete visual rhythm you want. A compact geometric stripe may need only a few rows. A flower with a stem, a larger medallion, or alternating motifs may need more.
In this example, the repeat interval is 12 rows. That gives enough vertical space for the flower-and-stem arrangement and creates visible boundary lines at regular intervals on the long canvas. Twelve rows are specific to this design—you can choose an interval that suits your own motif.
2. Turn on Vertical Repeat and choose the row interval
Open the Vertical repeat control from the design editor, switch it on, and set Rows per grid. Select Done to apply the setting.
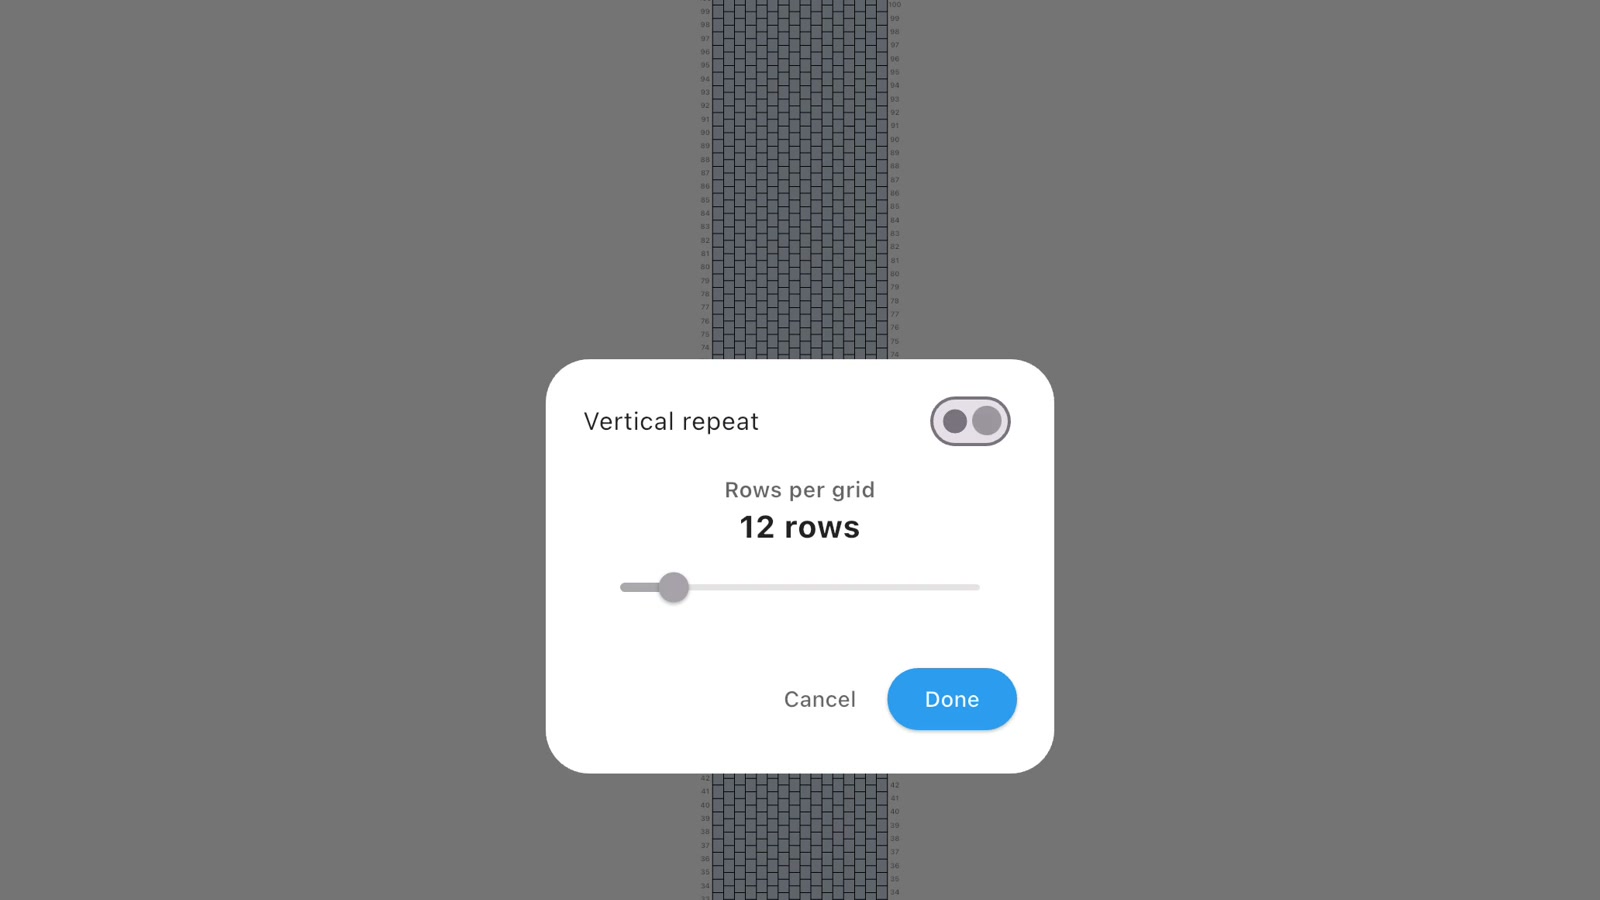
After you return to the editor, the stronger horizontal grid lines show where each repeat section begins and ends. These boundaries provide a useful visual guide as you place the motif.
3. Place one bead and check the repeated positions
Before drawing the whole motif, place one easy-to-recognize anchor bead. The example begins with a yellow flower center. As soon as that bead is added, matching yellow beads appear at the same relative position in the other 12-row sections.

Pause here and look down the canvas. If the repeated points have the spacing and alignment you expected, continue building around that anchor. This quick check is especially useful before adding a detailed outline or several colors.
4. Build a repeating peyote pattern one color at a time
The walkthrough is a repeating peyote pattern on a staggered Peyote 1-Drop grid. After placing the yellow centers, pink beads are added around them to form the petals. Each new pink edit is reproduced in the matching place across the vertical sections, so the flowers develop together.

The flowers alternate horizontally rather than sitting in one straight column. This gives the pattern more movement while the 12-row structure keeps the vertical spacing consistent. Green beads are then added to form stems and connecting details, again appearing throughout the repeated sections as each edit is made.
Working one color or one recognizable shape at a time makes the developing design easier to read. You can establish the centers first, surround them with petals, and finish with stems instead of trying to complete one isolated flower before understanding the whole rhythm.
5. Review the completed design across the grid
Once the motif is complete, zoom and pan along the canvas to inspect the transitions between sections. Look at the spacing around each flower, the placement of the green details, and the way the alternating motif continues across the stronger repeat boundaries.
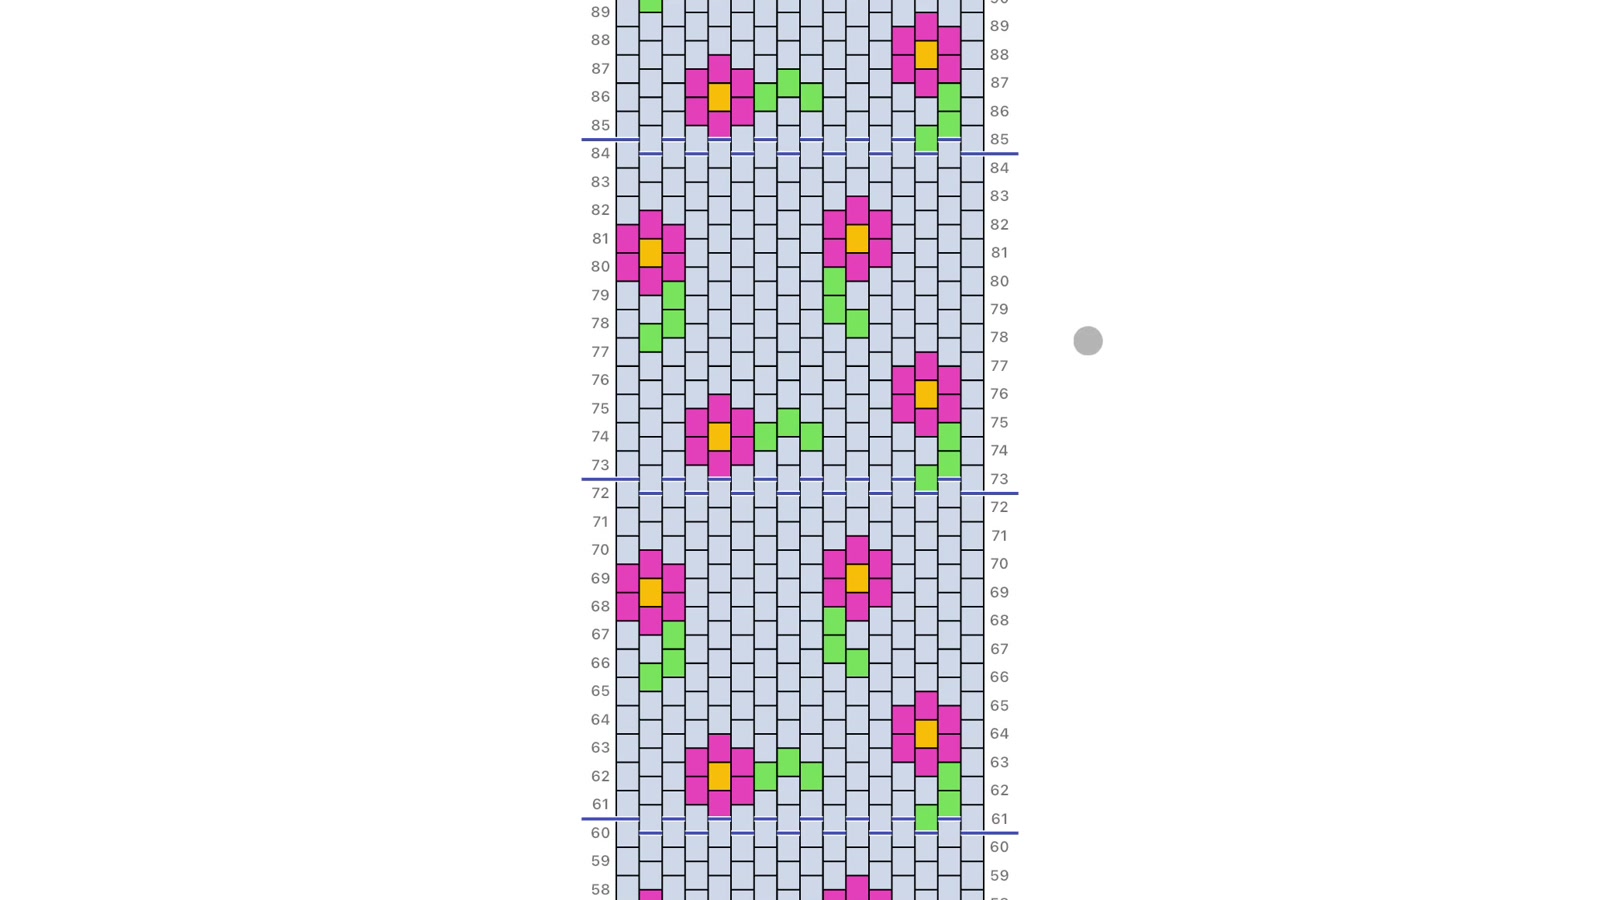
The completed editor view is useful for checking individual bead positions because the staggered grid and row numbers remain visible. If one part of the motif needs refining, you can continue editing while Vertical Repeat is enabled and see the change carried to the corresponding positions.
6. Check the repeating bracelet pattern in 2D and 3D
Open Preview when you are ready to look beyond individual cells. The flat 2D view shows the complete length of the repeating bracelet pattern, making the overall rhythm, spacing, and color balance easy to compare from beginning to end.

Switch to the curved 3D view to see the same floral pattern presented as a bracelet-style loop. Rotate or adjust the preview to examine how motifs appear around different parts of the curve. The two views complement each other: 2D is useful for checking the full layout, while 3D gives the design a more dimensional presentation.
Tips for planning a clean pattern repeat
- Choose the interval before adding detail. Base it on the height of the complete motif or sequence you want to repeat.
- Begin with an anchor point. A bright center bead or distinctive corner makes repeated alignment easy to confirm.
- Watch the section boundaries. Use the stronger grid lines to see how one repeat flows into the next.
- Build in simple stages. Add centers, outlines, and connecting details separately so changes remain easy to follow.
- Inspect both preview modes. Use flat 2D for the complete composition and curved 3D for a bracelet-style presentation.
For independent pattern designers and sellers, this workflow is especially useful when creating original borders, coordinated bracelet collections, or variations built around the same visual rhythm. A repeat interval gives the design a consistent foundation, while editable colors and bead positions leave room to make each version distinct.
Frequently asked questions
What does Vertical Repeat do in a bead pattern?
It divides the design into equal row intervals and reproduces each new edit at the corresponding position in those repeated sections. You choose the motif and draw it; Vertical Repeat keeps its placements consistent down the grid.
How many rows should a bead pattern repeat use?
Choose enough rows to contain the complete motif or color sequence you want to repeat. The floral example uses 12 rows, while a smaller stripe or larger decorative element may call for a different interval.
Can I create a repeating bead loom pattern?
Yes. Vertical Repeat is available for supported Loom designs as well as Peyote and Brick Stitch layouts. The canvas follows the structure of the technique selected when the design is created.
Does Vertical Repeat work with both 1-Drop and 2-Drop patterns?
Yes. Bead Designer supports Vertical Repeat on Peyote 1-Drop, Peyote 2-Drop, Brick 1-Drop, and Brick 2-Drop designs, in addition to Loom patterns.
Can I use several colors in one repeating motif?
Yes. The example starts with yellow centers, adds pink petals, and finishes with green stems. Building the motif color by color makes it easy to see how each part develops across the repeat sections.
Why check a repeating pattern in both 2D and 3D?
The flat 2D preview shows the complete composition at once. The curved 3D preview presents the design around a bracelet-style form, helping you inspect its appearance from a different perspective.
Create your next repeating bead pattern
Vertical Repeat turns a small motif into a consistent long design while keeping every creative decision in your hands. Set the row interval, add an anchor bead, develop the motif one color at a time, and finish by reviewing the complete result in both preview modes.
If you are beginning with a blank canvas, first see how to make a seed bead pattern from scratch. You can also learn how to replace colors in a bead pattern or turn the finished design into a bead pattern PDF with printable instructions.
Bead Designer combines technique-aware pattern grids, Vertical Repeat, color tools, 2D and 3D previews, Work mode, and printable instructions inside Knitting Row Counter. Create your next design with Knitting Row Counter on the App Store or Google Play.